
Reviewed · BLUE ICE & GLACIER WALKS
Stygge: Kayaking and Glacier Hike
Glacier day, but make it hands-on. I love how this trip mixes kayaking on Styggevatnet with a hike on the blue ice of Austdalsbreen, so you feel the glacier in two very different ways. I also like the calm, step-by-step guidance, with reports praising instructors who explain technique clearly and keep the whole day moving smoothly, including standout guides like Nahir and Marcelo.
There’s one trade-off to plan for: you’ll likely get wet on the kayak fast, and conditions can shift quickly, so you need a solid weather-ready kit and patience for cold water moments.
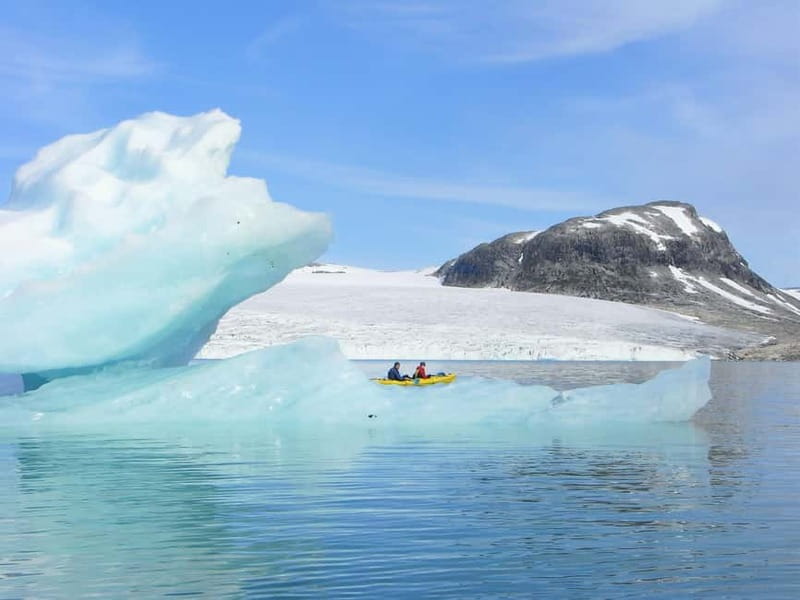
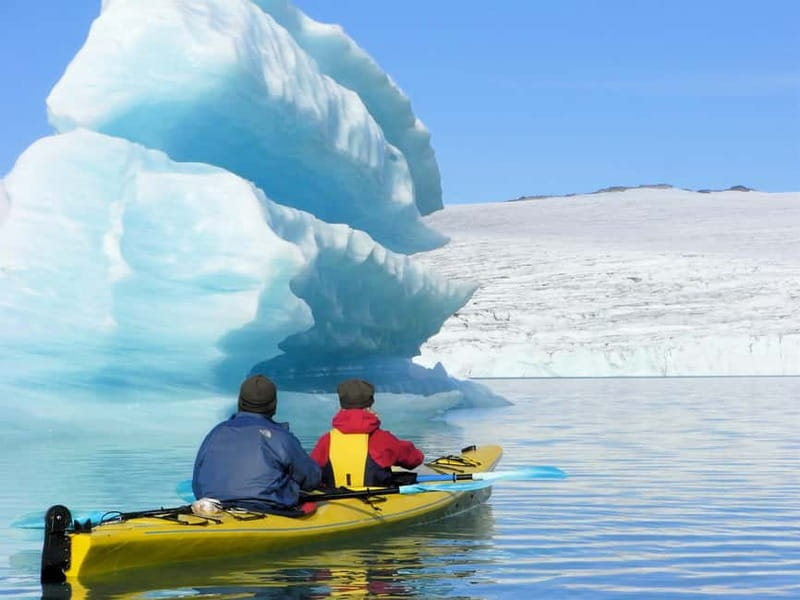
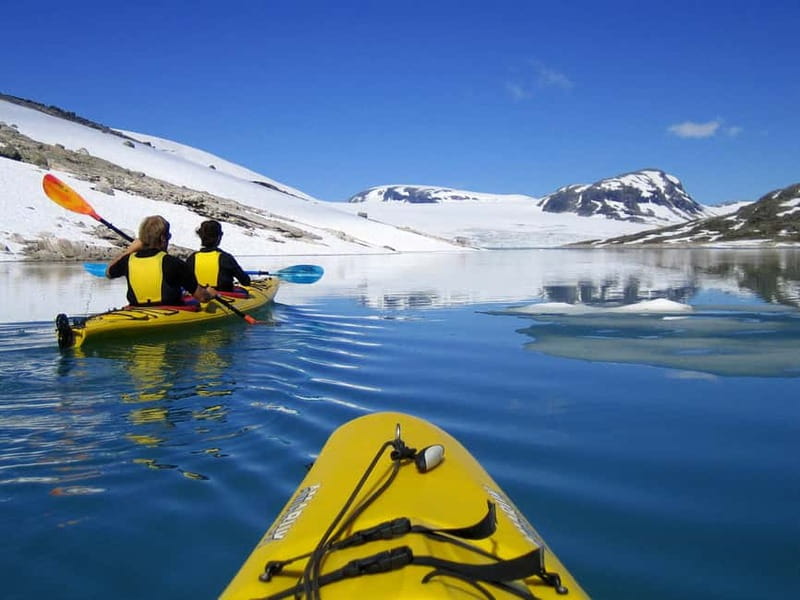
Styggevatnet first, then the glacier front: Paddle across a lake that stays snow-covered until mid-July, meaning you’ll likely see glacier-fed ice features along the route.
Blue ice hike with real crevasses: You walk on the ice itself for about 1.5 to 2 hours, exploring formations and getting explanations from your guide.
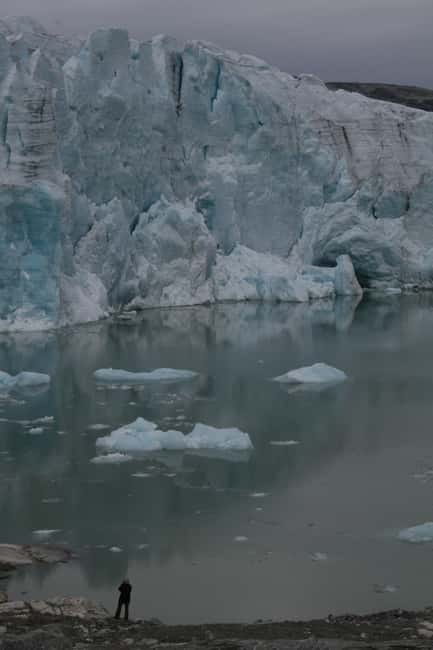
Lunch facing a 30-meter glacier wall: There’s a 30-minute break with views across the glacier front, which makes the pause feel like part of the show.
Small group, up to 9 people: More attention from your guide and easier pacing, especially useful if you’re new to either kayaking or glacier hiking.
Two safety briefings built in: You get a separate safety talk for the kayak and then again before the glacier hike.
In This Review
- Kayak Across Styggevatnet, Then Step Onto Austdalsbreen
- Meeting at Labben (The Lab) and Getting to the Glacier in Your Own Car
- Safety Briefings That Actually Matter (15 Minutes, Twice)
- Paddle Styggevatnet (About 1.5 Hours) and Spot Calved Icebergs
- Lunch With the Glacier Front in View (30 Minutes, Bring the Right Mindset)
- Austdalsbreen Safety Briefing (15 Minutes) Before You Step on Blue Ice
- The Blue Ice Glacier Hike (About 1.5 to 2 Hours)
- Why the Jostedalsbreen Views Feel Different From Every Angle
- The Return to the Kayaks and Back to Civilization
- Price and Value at Around $241 Per Person
- What Gear to Plan For (So the Cold Does Not Win)
- Who This Tour Suits Best
- Should You Book It?
- FAQ
- What is the location of this tour?
- How long is the experience?
- What time of year does this tour operate?
- Do I need kayaking or glacier hiking experience?
- Is lunch included?
- What equipment is included?
- How big is the group?
- What language is the guide?
- What should I wear or bring?
- How do I get to the glacier during the tour?
Kayak Across Styggevatnet, Then Step Onto Austdalsbreen
This is the kind of glacier trip I think works best in real life, not just in brochures. You start on the water, so you warm up your sense of space and balance. Then you switch to ice, where every step matters a bit more and your guide turns the glacier into a clear, understandable story.
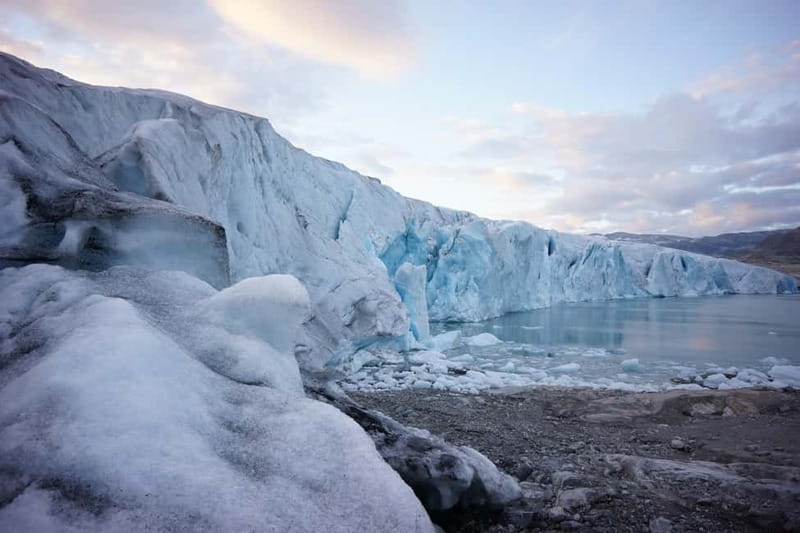
Austdalsbreen is part of Norway’s Jostedalsbreen National Park area, and the scale hits you early. The front of the glacier is massive, and the day is designed to let you experience that size from multiple angles, first from the kayak and later up close on the ice.
One detail I really appreciate is the pacing. The trip is long enough to feel like a full day, but it’s broken into clean blocks: short safety briefings, a solid stretch of paddling, then a lunch stop with glacier views, and finally time on the glacier itself. That structure helps you stay focused instead of just waiting for the next dramatic moment.
Meeting at Labben (The Lab) and Getting to the Glacier in Your Own Car
The day starts at Labben (The Lab). You check in inside, meet your guide, and can ask questions early. If you arrive a bit earlier, you can buy coffee and warm or waterproof clothing if you need it.
Then comes a practical Norway-specific point. You’ll follow your guide from the meeting point to the glacier in your own vehicle. That means you should plan for fuel and, if your route relies on phone navigation, keep your device charged. It’s not hard, but it is not the kind of day where you want to be stressed about logistics.
From a “make it enjoyable” perspective, this setup is actually good. You’re not stuck in a long bus ride guessing what gear you’ll need. You’re simply parked, checked in, and then off to the natural playground.
Safety Briefings That Actually Matter (15 Minutes, Twice)
You get a 15-minute safety briefing before each main activity. First, it’s on the water. Then there’s another before you start hiking on the glacier.
This is one of those parts that can feel boring if it’s rushed. But two separate briefings help because kayaking safety and glacier safety are not the same game. One review summary style point that rings true from what you’re told about the day: the guides focus on explaining technique and keeping things clear, so you understand not only what to do, but how to do it.
If you’re new, the best approach is simple. Treat those briefings like your “cheat codes.” Ask your questions while you have the guide right there, and listen for the gear and movement tips that match the conditions of that day.
Paddle Styggevatnet (About 1.5 Hours) and Spot Calved Icebergs
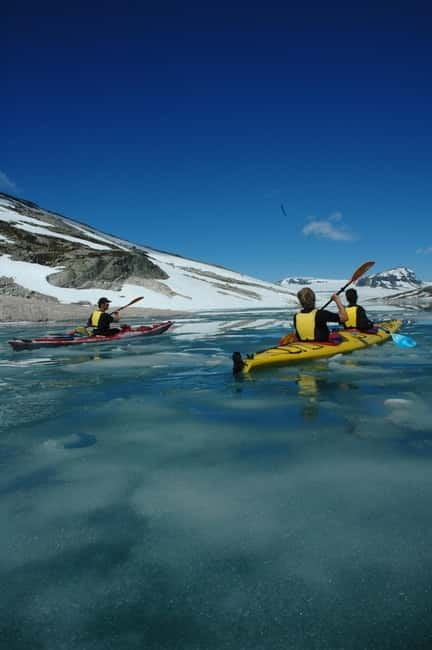
The first real experience is paddling across Styggevatnet. Your route starts where the lake is still involved with snow and ice conditions early in the season, and it can stay snow-covered until mid-July. The timing matters. If you go later in the summer, you may have calmer access and more open water, but you’ll still be in a glacier environment where ice imagery is part of the backdrop.
On the water, keep an eye out for icebergs that have calved off the glacier from previous days. That’s a neat way to connect the day you’re having to the glacier’s constant motion. The glacier is not a static wall. It’s actively producing ice and reshaping the scene.
What I like about starting with kayaking is how it sets expectations for how cold and wet this region can feel. One of the most useful real-world notes is that you get wet quickly while kayaking. So even if you feel confident, bring the attitude of, today includes water, not just views.
Lunch With the Glacier Front in View (30 Minutes, Bring the Right Mindset)
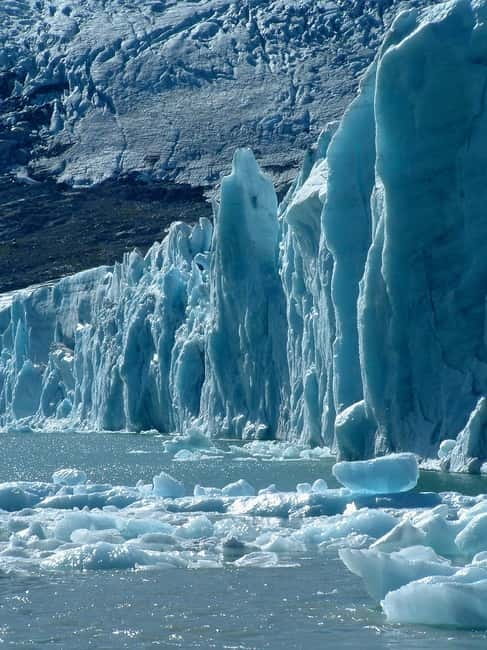
After kayaking, there’s a 30-minute lunch break while you enjoy the view across the front of the glacier.
Two key things here:
1) It’s part of the experience, not a rushed refuel.
2) Lunch is not included in the price.
So plan like a local and bring food accordingly. Pack something you can eat while staying warm, because the whole vibe of this day is cold-water, cold-ice, cold-air. The meal break is timed to keep energy up for the glacier hike, where you’ll want strength and focus.
Also, don’t be surprised if your brain keeps wandering back to the giant ice wall you can see. That’s normal. You’re going to be looking at ice for hours, and your mind does better when you give it a small reset.
Austdalsbreen Safety Briefing (15 Minutes) Before You Step on Blue Ice
Before the glacier hike, you’ll get another 15-minute safety briefing. This is the moment where the day shifts from kayaking logistics to glacier movement.
Even if you don’t have previous glacier experience, you don’t need to be a pro. The trip is built for people in good physical condition, and experience with kayaking or glacier hiking is not required. Still, glacier walking is different from normal hiking. The guide’s instructions are not optional style notes. They’re the difference between feeling confident and feeling panicked.
My practical advice: ask how you should move, where you should look, and how the group stays together. Small details matter on ice, especially around crevasses and uneven zones.
The Blue Ice Glacier Hike (About 1.5 to 2 Hours)
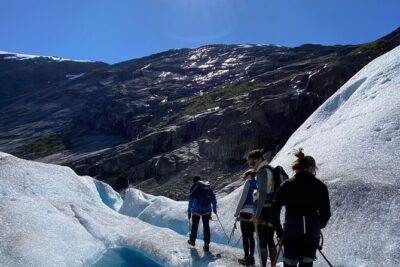
Now for the main event: hiking on the glacier itself. You start on the blue ice at the glacier front, then walk around huge crevasses toward the center of the glacier for commanding views over the lake and the Jostedalsbreen National Park area.
This is not just a walk for photos. The guide typically explains glacier features along the way, and you spend about 1.5 to 2 hours exploring and learning. That time window is long enough for the glacier to change from a scary word into a fascinating place you can actually understand.
What makes this part so highly praised is the combination of scale and clarity. You’re not staring at ice with no context. You’re walking near dramatic structures, and your guide helps you make sense of what you’re seeing.
A small practical warning: running shoes are possible, but they might not be the most comfortable choice on the glacier. If you’re choosing footwear, prioritize grip and comfort for your feet on icy terrain. You’ll also want to follow whatever gear guidance the guide gives you at check-in.
Why the Jostedalsbreen Views Feel Different From Every Angle
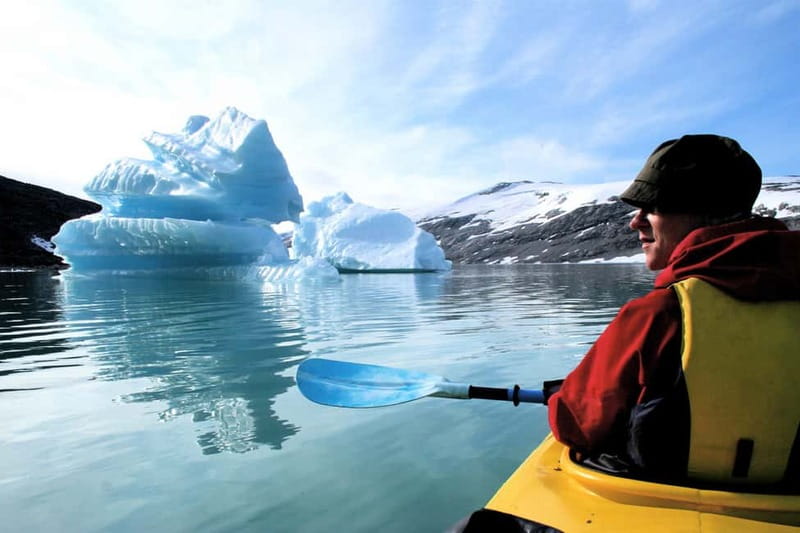
This trip is designed to hit you with the glacier from multiple viewpoints:
- From the kayak on the lake
- From lunch facing the glacier front
- From up close on blue ice with crevasses around you
- From higher or more central positions on the ice, looking out over the national park area
That multi-angle setup is one of the smartest parts of the itinerary. If you only did a viewpoint walk, the glacier could stay distant. If you only did a glacier hike, you might miss how the glacier interacts with water. Here, you get both.
Also, the glacier environment changes visually through the day. Snow coverage, ice color, and the shape of the ice all look different from where you stand. Even if you love photography, the real value is that you leave with a mental map of the place.
The Return to the Kayaks and Back to Civilization
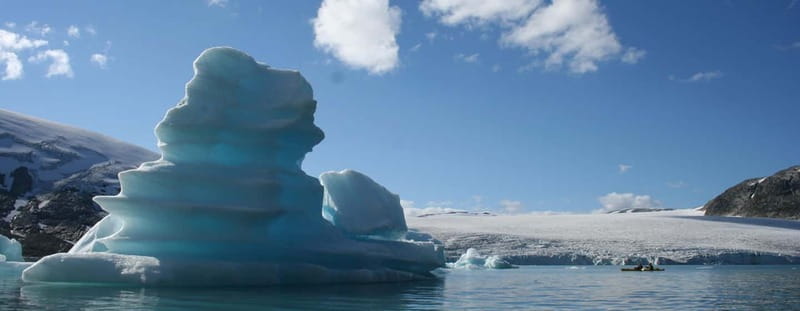
After the glacier portion, you walk back to the kayaks and paddle back to Styggevatnet. It’s the practical close of the day, where your arms and legs both get their last say.
This return part also helps you settle the whole experience. You’ve been on ice, then you’re back on water again. It makes the day feel complete rather than like you rushed through the glacier and left.
Keep in mind that your body will notice the cold. You’ll feel better if you plan to keep layers on and avoid lingering without wind protection, even during the calmer segments.
Price and Value at Around $241 Per Person
At $241 per person, this isn’t a bargain-basement activity. But when you look at what’s included, the value starts making sense.
You get:
- All boating and glacier equipment
- An instructor
- Glacier information
And you’re not just doing one activity. You’re doing a full kayak session plus a glacier hike, with safety briefings and guided time on ice. Small group size, limited to 9 participants, also matters. It usually means more attention and smoother pacing.
Transportation is not included, but you’re using your own vehicle to follow the guide to the glacier. That can be a plus if you’re comfortable driving in Norway and want to avoid extra transfer hassles.
So, for me, the “value question” is simple:
- If you want one organized day that gives you both kayaking and glacier hiking, the price feels fair.
- If you just want one photo moment and you already have your own gear or you don’t care about instruction, you might feel less satisfied.
What Gear to Plan For (So the Cold Does Not Win)
The best gear is weather-adapted, not just warm. Conditions can change quickly, and a warm hat is strongly recommended. If you wear running shoes, remember they may not feel great on the glacier, even if they work.
Because kayaking means you can get wet quickly, dress like water will find you. Waterproof layers matter more than you think on a cold lake day.
If you’re short on time or forgot something, the check-in spot sells warm and waterproof clothing. That’s a nice safety net, especially for hat choices and extra layers.
And pack like you’ll be cold, then cold again. Bring enough layers to stay comfortable during breaks, and don’t count on the sun to do all the work.
Who This Tour Suits Best
This tour makes sense if you:
- Are in good physical condition
- Want instruction for both kayaking and glacier hiking
- Prefer a small group experience with a live English guide
- Like learning, not just sightseeing
You do not need prior kayaking or glacier hiking experience. Still, you should be ready for real outdoor effort. This is not an “easy stroll” day. It’s a guided day outside, on ice and water, with movement throughout.
If you hate getting wet, you can still do this trip, but you should plan properly. Getting wet is part of the kayaking experience here.
Should You Book It?
If you’re aiming for a glacier day that is hands-on, guided, and paced well, I’d say book it. The combination of kayaking across Styggevatnet and a long blue ice hike on Austdalsbreen is the main reason to choose this. You get multiple angles, two safety briefings, and equipment handled for you.
But only book if you can handle cold conditions and don’t mind water on the kayak. Bring a warm hat, layer up, and expect to feel chilly at some point. If that’s your kind of challenge, this is a strong pick for Jostedalsbreen National Park.
One last decision helper: if you want learning and clear instruction in English, with small-group attention, this trip is built for that exact comfort zone.
FAQ
What is the location of this tour?
It runs in Vestland County, Norway, with the meeting point at Labben (The Lab) and then a drive in your own vehicle to the glacier area.
How long is the experience?
The total duration is listed as 450 minutes.
What time of year does this tour operate?
It starts in early July and runs until the end of September, after the lake has defrosted.
Do I need kayaking or glacier hiking experience?
No experience is required, but you should be in good physical condition.
Is lunch included?
No, lunch is not included, even though there is a lunch break with glacier views during the day.
What equipment is included?
The tour includes all boating and glacier equipment.
How big is the group?
The group is limited to 9 participants.
What language is the guide?
The live tour guide speaks English.
What should I wear or bring?
Weather-appropriate clothing is recommended because conditions can change quickly. A warm hat is highly recommended. You may get wet on the kayak, so waterproof layers can help. Running shoes are possible, but not so comfortable on the glacier.
How do I get to the glacier during the tour?
After meeting at Labben (The Lab), you need to follow the guide in your own vehicle to the glacier. Make sure you have enough fuel or charge for the drive.
Summits on Foot
- From Tromsø: Snowshoeing Hike with Picnic Lunch and Photos★ 4.9 · 840 reviews
- From Tromsø: Guided Husky Snowshoe Hike and Husky Camp Visit★ 4.9 · 715 reviews
- From Tromsø: Snowshoe Hike in the Arctic★ 4.9 · 467 reviews
- Guided hike to Pulpit Rock Preikestolen★ 5.0 · 390 reviews
Crampons & Blue Ice
- From Bergen: Folgefonna National Park & Glacier Lake Tour★ 4.9 · 589 reviews
- Olden Shore Excursion: the Amazing Briksdal Glacier★ 4.5 · 431 reviews
- Bergen Day Tour to National Park Folgefonna and Glacier Lake★ 5.0 · 408 reviews
- From Olden: Briksdal Glacier Guided Hiking Shore Excursion★ 4.5 · 123 reviews
Blue Ice & Glacier Walks, compared.
Olden Shore Excursion: the Amazing Briksdal Glacier
Read our review →
Bergen Day Tour to National Park Folgefonna and Glacier Lake
Read our review →
From Olden: Briksdal Glacier Guided Hiking Shore Excursion
Read our review →
Easy Hike to Bondhus Glacier Lake & Rosendal Visit
Read our review →
Glacier Hiking and Kayaking Tour on Nigardsbreen Glacier
Read our review →Browse the lists this tour appears in